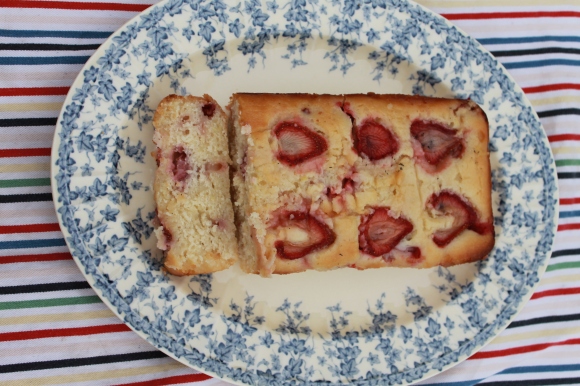
Strawberry Lemon Loaf

I have a confession for you.

I’m weird. Like really weird.

I’m currently wearing jeans and a pullover. Not a sissy, thin, white fleece-y pullover. A black, too big, heavy, legit pullover. Oh yeah, and it’s the first day of summer. Am I broiling under my hefty sweater? No. In fact, I am sitting purposefully in direct sunlight, despite the glare on my computer screen. I would like to roll down my pants for added warmth but I enjoy the summer-chic, rolled cropped pants look. My dad asks when the flood’s coming. I tell him the flood of paparazzi will arrive soon to photograph my chic outfit.

Further proof that weirdness is genetic.

As if you need additional proof, I also enjoy am obsessed with looking at food on the internet. Food blogs, food magazines, food pictures, food books (aka cookbooks), reviews of restaurants, food anything. If it’s online, I’ve probably stumbled across it. Or stumbled upon it.

This happens a lot during class. I don’t know why. It’s not like I’m purposefully trying to not pay attention. The food just calls to me…

Like when Martha decided to make Lemon Loaf. It just called to me. Strawberries, too. They called to me. They called my phone and asked if they could elope with the lemon loaf. Yes, Strawberry. Oh yes, I would like that a lot.

Their lemon-glazed child is a thing of beauty. Make it. Make it now. Or forever hold your peace.


I can’t eat red velvet cake…

But I sure can make it.

Why can’t I eat red velvet cake, you ask? Well, let me tell you a tale of a loving girlfriend who decided to make her boyfriend and her rambunctious friends red velvet cupcakes. These delicious cupcakes were at the final stage. They were cooling to that perfect touchability the anxious call room temperature as the cream cheese frosting was being whipped into creamy, delicious oblivion.

Hurriedly forgoing the proper icing bag for the time-saving and rather disgusting finger-icing option, the friends began to devour their warm, moist, long-awaited treats when an idea occurred to the counterpart of our heroine.

What an idea.

How hilarious would it be, how much laughter would be induced, how many stomachs would twist with the welcome pain of joyous cackling  if we started a food fight.

A split smile later and all was lost. The cupcake heard round my kitchen was shoved UP MY NOSE.

Unless you have had the painful pleasure of having some malleable item shoved up your nose, I don’t think you can understand the supreme disgust you will forever more feel for that one item. The memory of not quite being able to remove the cake from your nostrils will forever disincline you to eat it. Forever.

It may also induce you to tell the tale of your misfortunes any and every time that this item is brought up, much to the annoyance and amusement of your joyous friends, whom had been fortunate enough to evade such mishaps.

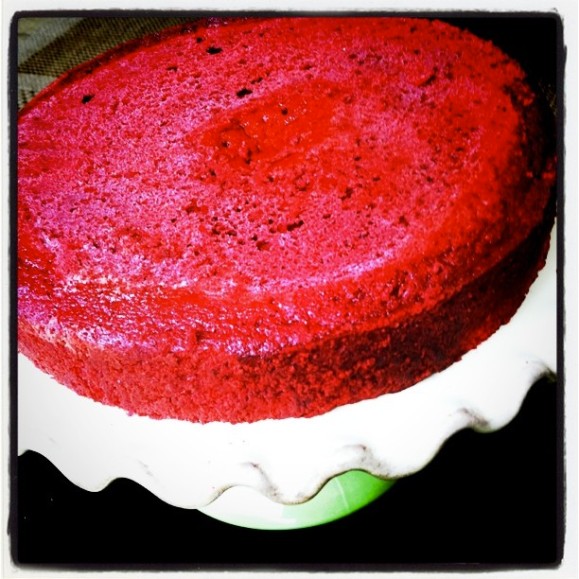
My repetitive story-telling habits cannot, however, prevent me from caving to my brother’s wishes when it comes to his graduation cake. So I made him a red velvet cake.

And from the tiny bite I could suffer to shove down, and the fact that it disappeared rather quickly… I would venture to say that it was a success!

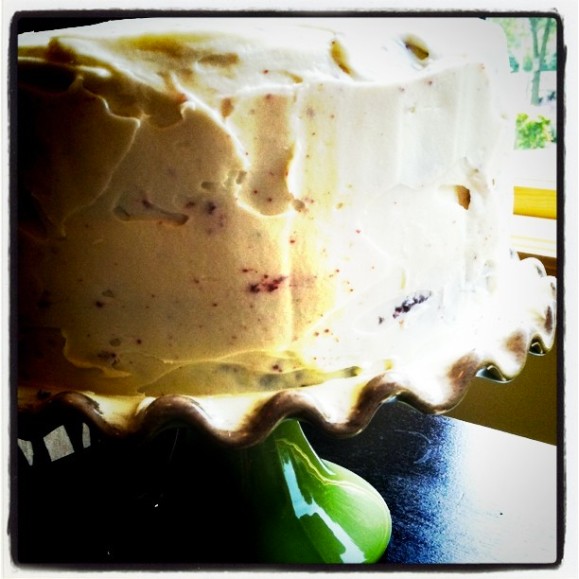
Although my cake-decorating skills may need some help… Those are supposed to be tiger paws… Not flowers…

But don’t let my poor decorating skills or horrifying story make you cringe at the thought of making this red velvet cake. Red velvet is delicious. Exactly like its name, it is red, with a smooth, light chocolate flavor. And oooo baby when you throw on some of this brown sugar cream cheese icing. Oh man. I could (did, actually) eat this icing until I felt sick.

You want to make this icing. Trust me. I tell you these things because I love you more than I love either of our waistlines.

Make the icing. Maybe make the cake. Who’s judging?

Red Velvet Cake with Brown Sugar Cream Cheese Frosting from Joy the Baker

8 Tablespoons unsalted butter, at room temp

1 cup plus 2 Tablespoons granulated sugar

2 large eggs, at room temp

1/2 teaspoon vanilla

2 cups cake flour

2 Tablespoons cocoa powder

2 teaspoons baking powder

1/4 teaspoon baking soda

1/2 teaspoon kosher salt

3/4 cup buttermilk

scant 2 Tablespoons Red Food coloring

1. Preheat the oen to 325.  Sift together flour, cocoa, baking powder and baking soda.  Add the kosher salt after sifting and set aside.  Measure out the buttermilk and red rood coloring.  Add the die to the buttermilk for easier incorporation later.

2. Cream the butter and the sugar using an electric mixer, until the mixture is pale and fluffy.  Add the eggs one at a time, letting the eggs beat for 1 mintue in between additions.  Scrape down the bowl in between additions.

3.  Add the dry ingredients alternately with the wet ingredients.  Start by adding one third of the flour mixture.  Mix just to incorporate.  Add half of the buttermilk.  Add another one third of the flour mixture.  Mix to incorporate.  Add the last half of buttermilk, followed by the last third of flour.

4. Spoon into paper lined cupcake pans.  Check the cupcakes after 12 minutes.  Makes 12 cupcakes.

The cupcake recipe should be doubled for the amount of frosting the below recipe produces. The make 24 cupcakes, or a two layer 8-inch or 9-inch round cake, double the cake recipe above, and use the frosting recipe below as is.

Brown Sugar Cream Cheese Frosting

1 1/2 cups butter, softened

8oz cream cheese, softened

1/4 cup light brown sugar, packed

1 teaspoon vanilla extract

2-4 tablespoons milk

4-6 cups powdered sugar

depending on desired consistency

Cream the butter and cream cheese together in an electric mixer.  (Be sure that the two are at room temperature.  Cold cream cheese or butter can make your frosting lumpy.)  Add the brown sugar and vanilla extract, and beat for about 2 minutes.  Turn off mixer and add 2 cups of powdered sugar.  Turn the mixer on a low speed so the sugar doesn’t fly out of the bowl.  Slowly add more sugar alternately with the milk until you reach your desired consistency.  I like my cupcake frosting to be slightly more thick than cake frosting, so it can hold its shape on the cupcake.

Experimentation

Sometimes you just have to take a leap of faith. Dive off the diving board. Kiss him. Take the job. Buy those shoes.

In the world of baking, there are many leaps of faith available for the taking.

Our experiment began with Strawberry Romanoff, which is a fancy-sounding dessert that is really very simple. It’s simply a combination of sour cream, brandy, and brown sugar. IT’S SO GOOD.

And it looks darn good too.

Think of this as your new summer dessert. This is all you need to make all summer. And don’t just stick with strawberries. Get wild and crazy. Add blackberries, blueberries, pineapple, whatever your favorite summer fruit is, it will be even more delicious when smothered in Romanoff sauce.

With a lack of fruit, and the intention to make these lava cakes…

Well, can you see where this is going?

We added  the Romanoff sauce to the cake.

It was actually good. The sour cream made the box cake that we used light and fluffy, and the brandy and brown sugar added a sweet, rich flavor.

So make this sauce. And experiment with it. Or just devour it straight out of the bowls… Without even the fruit.. That may or may not have happened. A lot.

Strawberry Romanoff

1 cup sour cream

2 tablespoons brandy

6 tablespoons brown sugar

Lots of fruit.. Like a giant box of strawberries, sliced.

Mix together the brandy, sour cream, and brown sugar. Dip the strawberries in the sauce, or drizzle it over the fruit. Whatever you do, consume. Consume the sauce. Now.

Cheesecake Brownies

Sometimes part of baking is failing. In the words of a highly esteemed friend, “you ruined the cheesecake part with the brownie part.” So maybe you don’t try these.. or maybe when you do you use a box brownie mix. The brownie part I made was dry (probably due to slight over-baking) and kind of bitter.. too much bittersweet chocolate.

But the cheesecake part…. Now that was good. Creamy, moist, and just the right amount of sweet… I almost just ate off the top portion. Almost. I may still. Hey, someone’s gotta eat it right?

So here’s the recipe. I’d probably try it with a brownie box mix, or maybe just use semi-sweet chocolate. Maybe if I did a better job of mixing the cheesecake with the brownie… Or maybe just just bake it for less time. Scratch that. Do that anyway. The more dough-like, the better. Duh. That’s Brownie 101.

Anywho… Here’s the recipe. Give it a try. Maybe I’ll retry it.. We’ll make it better. And eventually we will have delicious Cheesecake Brownies to shove in our mouths.

Cheesecake Brownies
One 9-inch (23cm) or 8-inch (20cm) square pan

Adapted from Ready for Dessert (Ten Speed)

For those of you who like higher brownies, use an 8-inch pan.

6 tablespoons (85g) unsalted butter, cut into pieces
4 ounces (115g) bittersweet or semisweet chocolate, chopped
2/3 cup (130g) sugar
2 large eggs, at room temperature
1/2 cup (70g) flour
1 tablespoon unsweetened cocoa powder
1/8 teaspoon salt
1 teaspoon vanilla extract
1/2 cup (80g) chocolate chips

8 ounces (200g) cream cheese, at room temperature
1 large egg yolk
5 tablespoons (75g) sugar
1/8 teaspoon vanilla extract

1. Line a 9-inch (23cm) or 8-inch (20cm) square pan with foil, making sure it goes up all four sides. Use two sheets if necessary. Mist with non-stick spray or grease lightly.

2. Preheat oven to 350 degrees (180C).

3. In a medium saucepan, melt the butter and chocolate over low heat, stirring until smooth. Remove from heat and beat in the 2/3 cup (130g) sugar, then the eggs.

4. Mix in the flour, cocoa powder and salt, then the vanilla and chocolate chips. Spread evenly in the prepared pan.

5. In a separate bowl, beat together the cream cheese, the yolk, 5 tablespoons (75g) of sugar, and vanilla until smooth.

6. Distribute the cream cheese mixture in eight dollops across the top of the brownie mixture, then take a dull knife or spatula and swirl the cream cheese mixture with the chocolate batter.

guacamole and ginger

A surprising alliteration that adds up to dinner. My dinner, to be exact. And soon to be your dinner? Yes.

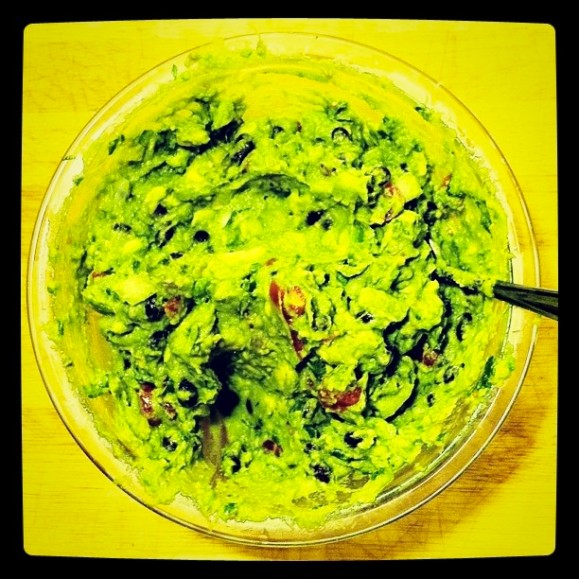
Guacamole is literally one of my favorite foods ever, to make, to eat, smother over things… Everything should be done with guacamole. Life lessons with Kaity.

Except maybe eating these ginger cookies. They were an experiment. They’re also vegan. If you don’t like ginger, take a hint from the name and steer yourself away from these… But if you’re a ginger nut (root?) like me… get all up in these cookies. Cake-like, chunky, delicious, and they don’t even use up your butter and eggs. Could a girl ask for more?

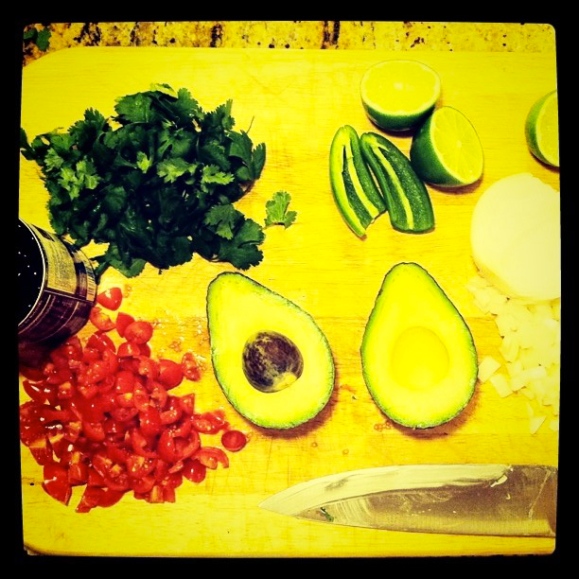
But let’s discuss this guacamole more… since avocados are in season and probably on sale at your grocery store. One of the wonderful things about guacamole is that you can play with it. Put whatever you like in it… Or just whatever you have in the fridge.

In this absolutely fabulous batch went…

4 Hass avocados

1/2 white onion, diced

1 jalapeno, diced

1/2 cup cilantro, roughly chopped

1/2 can black beans (rinsed)

Juice from 3 limes

2 cloves garlic, minced

Kosher salt to taste

1 cup grape tomatoes, diced

Mash that all together, and change the flavor around until it’s how you like it.. It’s your guac. Do what you want.

Soft Vegan Ginger Cookies from Joy the Baker

Ingredients

  • 1 1/2 cups all-purpose flour
  • 1 1/2 whole wheat flour
  • 1 teaspoon baking powder
  • 1/2 teaspoon baking soda
  • 1/2 teaspoon salt
  • 1 teaspoon ground ginger
  • 1 cup minced candied ginger
  • 1 cup vegan granulated sugar (if you’re hardcore… or just go for regular granulated sugar)
  • 2 tablespoons ground flaxseed
  • 1/2 cup unsweetened applesauce
  • 1/4 cup canola oil
  • 1 teaspoon lemon zest
  • 1 tablespoon fresh lemon juice
  • 1/4 cup vegan granulated sugar, for rolling the cookies balls

Instructions

  1. In a large bowl, whisk together flours, baking powder, baking soda, salt, ground ginger, and minced candied ginger. Set aside.
  2. In a medium bowl, whisk together sugar, ground flaxseed, applesauce, oil, and lemon zest and juice.
  3. Add the wet ingredients, all at once, to the dry ingredients and carefully mix together with a wooden spoon. Make sure all the flour bits are moistened and well incorporated. Form dough into a disk shape and wrap well in plastic wrap. Refrigerate for an hour, or overnight.
  4. Place a rack in the center and upper third of the oven and preheat 350 degrees F. Line two baking sheets with parchment paper.
  5. Remove the dough from the fridge and use your hands to roll dough into walnut sized balls. Rolls balls in granulated sugar and place of baking sheet. Use the palm of your hand to slightly flatten the dough ball. Bake for 15 to 18 minutes, until just slightly browned but still slightly soft in the center. Remove from the oven and allow to cool on the baking sheet for 5 minutes before removing.
  6. Store cookies in an airtight container at room temperature for up to 4 days.

Preparation time: 15 minute(s)

Cooking time: 15 minute(s)

confessions

I have a confession to make. You may think that because I’ve been absent in your life, I have been doing very important things, like working with African children, or digging wells in Middle America, or even just kind things like helping elderly neighbors.

True Life: I haven’t been doing any of these things.

I have been sleeping until 1. Every. Day. After I roll out of bed too late, I sit at the kitchen counter and drink coffee and talk to my dad. Once I got myself up and went to the gym. Boy was that a mistake. Can you believe that a week of inactivity really diminishes muscle growth??

I was kind of productive… Kind of. I finished a book, The Help. It’s a fabulous, girly, heartfelt book. And for those of you who’d rather watch a movie, my actress girl crush Emma Stone is starring in the movie that’s coming out this summer. We should all go see it together, yes?

Okay… So maybe finishing a book I started a year ago doesn’t count as productive. This chicken pot pie demolished by me and dad, on the other hand, screams PRODUCTIVITY.
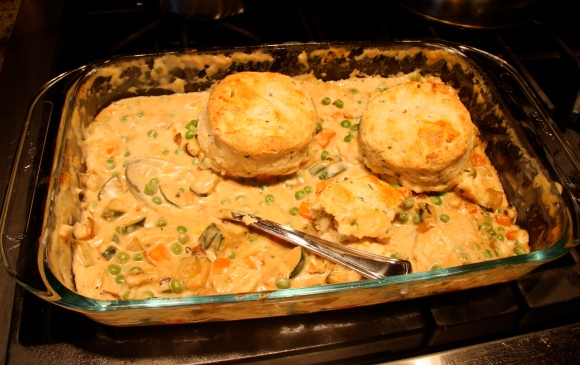
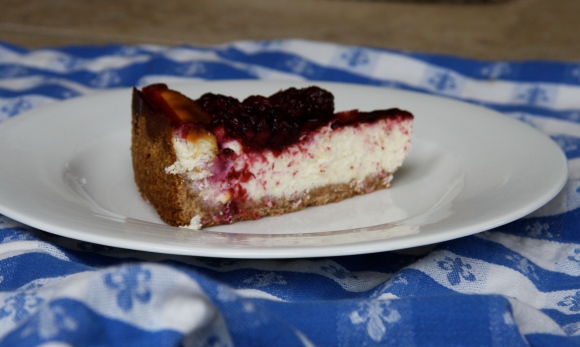
I went to the grocery store for this. I put on makeup, and shoes, and real clothes. And now I need to get my booty back to the gym, because chicken pot pie followed by some fabulous Blackberry Cheesecake like this certainly doesn’t scream BEACH BOD.
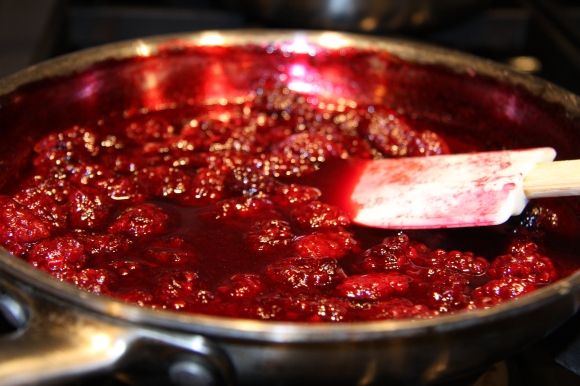
Let me tell you something about this cheesecake. The crust is made with Vanilla Wafers. And a teaspoon and a half of vanilla extract. This is definitely one for the recipe book, my friends. I want you to get on this cheesecake. Make it with whatever you like. Put in some Oreos, or use raspberries instead of blackberries. Mix it up! Or make it low sugar and low fat for your pops. Play with it. You can do it. You are a strong, confident woman who does not need to follow a recipe. (Friends reference anyone?)
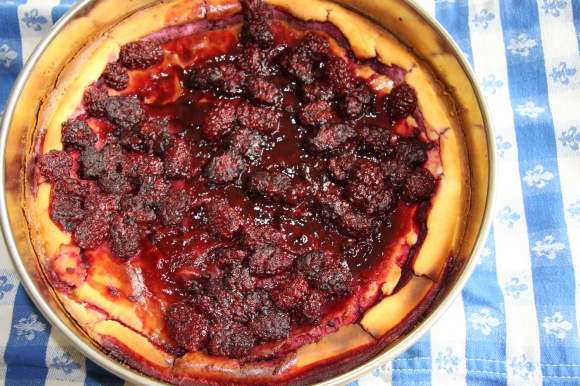
Or just go old school and follow the recipe. Your choice. Really the only requirement is to shove this cheesecake in your face. And then maybe we can hit the gym.
Chicken Pot Pie with Cream Cheese and Chive Biscuits, from Joy the Baker

For the Biscuits:

2 1/2 cups all-purpose flour

1 tablespoon baking powder

1/4 teaspoon baking soda

1 teaspoon salt

1 teaspoon granulated sugar

1/2 to 1 teaspoon coarsely ground black pepper (depending on how spicy you like your biscuits)

1/4 cup chopped fresh chives

1/4 cup (2 ounces) unsalted butter, cold and cut into cubes

4 ounces (half of a brick) cream cheese, cold

3/4 cup buttermilk, cold

For the Filling:

4 tablespoons unsalted butter

1/2 cup all-purpose flour

2 cups chicken broth

1 1/2 cups whole milk

4 ounces (half of a brick) cream cheese

salt and pepper to taste

1 tablespoon fresh lemon juice

1/8 teaspoon fresh ground nutmeg

3 cups shredded chicken meat

2 tablespoons butter or olive oil

1 small onion, diced

1 small garlic clove, minced

1 1/2 cup thinly diced carrots

1 cup diced zucchini (optional)

1 1/2 cup frozen peas, thawed

Start by making the biscuits.  In a medium bowl, whisk together flour, baking powder, baking soda, salt, sugar, black pepper, and chopped chives.

Add butter and cream cheese to the dry ingredients.  Use your fingers to quickly incorporate the fat into the flour.  Break up the butter and cream cheese with your fingers until some of the fat is the size of oat flakes and some of the fat is the size of small pebbles.

Make a small well in the center of the fat and flour mixture.  Add the buttermilk.  Using a fork, combine the wet and dry ingredients.  Try to moisten all of the flour bits with the liquid.  Dump the shaggy biscuit dough onto a lightly floured work surface.  Knead together until dough forms a disk about 1 1/2 inches thick.

Use a round, 1 1/2-inch biscuit cutter to cut biscuits.  Gather the dough scraps, knead for a few turns, and cut out more biscuits until no dough remains.  Place biscuits on a small cookie sheet and place in the fridge until ready to bake.

Next, make the filling.  Place a rack in the center of the oven and preheat oven to 400 degrees F.

Dice onion, garlic, carrots, zucchini, and thaw the frozen peas.  Set aside.

In a medium saucepan over medium heat, melt butter.  Whisk in the flour.  Mixture will be very thick.  Heat for 1 minute.  Turn flame to low and add the chicken stock.  Whisk until no flour bits remain.  Whisk in the milk and add the cream cheese.  Heat over medium low heat, stirring often, untilcream cheese has melted and the mixture is the consistency of warm, thick pudding.  Add chicken, lemon, and nutmeg.  Stir.  Add salt and pepper to taste.   Remove mixture from heat and set aside.

In a medium skillet over medium heat, melt butter (or olive oil, if using).  Add onions and saute until translucent, about 3 minutes.  Add minced garlic and saute for one minute more.  Add carrots, zucchini, and peas.  Cook for  about 3 minutes.  The vegetables will not be entirely cooked through.  That’s ok!  Remove from heat and add vegetable mixture to the creamy chicken mixture.  Stir to combine.

Spoon filling into a 9×13-inch pan.  Remove the biscuits from the fridge and place them on top of the filling.  Brush the tops of the biscuits with heavy cream, buttermilk, or egg wash.

Bake for 20-23 minutes, or until biscuits are puffed and golden, and the sides of the pot pie are bubbling.  Remove from the oven and allow to cool slightly before serving.

To reheat, preheat the oven to 300 degrees F.  Cover dish with foil and bake until warmed through, about 15 minutes.  Serve.

Chicken Pot Pie will last, well wrapped in the refrigerator, for up to 4 days.

Blackberry Cheesecake

Crust

  • 1 box Vanilla Wafers
  • ½ cups Pecans
  • 1 stick 1/2 Cup Butter, Melted
  • 1-½ teaspoon Vanilla

Filling

  • 3 packages 8 Ounce Cream Cheese
  • 1-½ cup Sugar
  • 4 whole Eggs
  • ½ cups Sour Cream
  • Topping
  • 2 cups Blackberries
  • ½ cups Sugar
  • 2 Tablespoons Water

Preheat oven to 350 degrees.

Place vanilla wafers and pecans into the bowl of a food processor. Pulse until mixture becomes crumbs. Add melted butter and vanilla and pulse again until combined. Pour into a 10-inch springform pan and press crumbs into the bottom of the pan. (If they come up the sides, that’s okay!)

For the filling, beat cream cheese and sugar until smooth. Add eggs one at a time, beating after each addition. Add sour cream and mix again. Pour mixture into crust, smooth the top, and bake for 1 hour, 10 minutes. Turn off oven and open door and allow to sit in the oven with the door opened for 15 minutes. Remove and allow to cool.

For the topping, add blackberries, sugar, and water to a saucepan or skillet. Bring to a boil over medium-high heat and cook for 4 to 5 minutes. Turn off the heat and allow to cool slightly.

Pour blackberries over the cheesecake and place pan into the fridge to cool and set for at least 2 hours—several hours is better.

When ready to serve, remove rim around pan and slice into 16 pieces with a long serrated knife.

springy spring

In the midst of spastically realizing that there are only 2 weeks left to first half of my college career, writing 30 pages of in-depth analysis, and trying to get my life together for the summer, I would really just like to tell you that I missed you, blog friends. This being said, I would like you to know that from the depths of my heart, you are some of my absolute favorite people.

I guess what I’m trying to say is… I love you. I miss you. Let’s be friends again.

Maybe you remember my goal for this past Christmas break.. I wanted to bake at least once a day, and then of course, I told you about my baking adventures (or misadventures).

Well a new season is upon us, and I think it’s time to begin again. Spring is a time of new beginnings, yes?

YES!

So let’s make it through the rest of the school year with happy, analysis-filled hearts, and we’ll have a grand time in two weeks. We will bake, and be springy! (do you see what I did there?)

But wait… you didn’t think I would let you leave without telling you about some freaking delicious cookies I made did you?

These toffee cookies are literally the bomb.com.

Especially if you add chocolate chips.

They’re just the recipe on the back of the Heath Bits O’ Brickle bag of heath bits. Sometimes I think back-of-the-bag recipes are the best kinds (at least to start with)

Tory thinks so too =)

the hunt

I’m dating a boy. Well, a man. Okay no, I take that back. I’m a girl, dating a boy. He makes me laugh a lot. He holds my hand sometimes. He’s been known to give me a flower or two. He even tells me he loves me.

This is mostly irrelevant, and I’ll tell you why.

HE HAS A KITCHEN.

It’s a glorious, glorious, cycle of love that me and this boy have going. You see, he loves to eat. And, if you couldn’t figure this much out, I love to cook. When we get together, magical things happen. Like these sweet potato fries. Were you thinking of something else?

So basically sweet potatoes are my current obsession. I have this problem, you see, where I get easily obsessed with things. Like television shows during finals. Or blogs. Or guacamole. Or caprese. Generally its food things. Like sweet potatoes.

So I went to see Jordan (that’s the boy) and I decided that I was going to complete our little love cycle of food preparation and consumption. So I made him some yummy Greek pitas I’ll have to tell you about later, and on the side, these sweet potato fries.

I made them look cool and artsy with my editing… Do I lose cool and artsy points by telling you I tried to make them cool and artsy? Probably… oh well. Its sort of my life goal to be cool and artsy… so ya. I edited that picture… in an attempt to make sweet potatoes cool and artsy. But they kind of look like they’re aflame….

Anywho….

These sweet potato fries are really just raw sweet potatoes, peeled, sliced, tossed with olive oil, salt, and some pepper, put on a baking sheet lined with aluminum foil, and baked at 400 degrees for… 20 minutes? I just kept checking them until they tasted good. I might let them go a bit longer next time, so they’re crispier. But really, they were delicious. Just olive oil, salt, and pepper, really let the sweetness in the potato stand on its own… Just what you want. No tricks, no trades… Just yummy sweet potatoes. They’re even easier if you find boys to cut them up for you, too.

you can always tell…

You can generally tell its nearly springtime here in Nashville because it was 60 degrees approximately 3 days ago. It is now 30. You can also tell its springtime because people (myself included) have an obstinate desire to prod the weather along by wearing skirts, flowery blouses, wispy scarves, etc.

So far this hasn’t worked… but I do always like to try, in the hope that one day God will get the hint.

Why do I tell you these things, you may ask?

Well, despite the fact that I am again resoundingly kitchenless and have nothing really to post about… I still like to write to y’all. Whoever you are. So I’ll tell you things when I’m supposed to be studying. You can read them when you’re supposed to be studying. It’ll be like a glorious, vicious circle of blog love.

There are very important things I have to tell you, though. This is the first:

I HAD THE BEST PANCAKES OF MY ENTIRE LIFE.

They were found at Pancake Pantry, in Hillsboro Village, Nashville, TN. Google them. They’ll come up. Apparently people have heard of them.

Since so many people have heard of the best pancakes EVER, you have to pick your time. Like I did (I’m so smart.. that’s why they let me go to college). For example, you may have a choice one pouring Tuesday morning of sleeping an extra 2 hours or walking 20 minutes to get pancakes.

GO GET THE FREAKING PANCAKES

And then return to the shelter of your bed with your overstuffed belly. DO NOT make the poor choice of going to class. THIS IS A BAD IDEA.

Caps make sure you know that all of the things I’m saying are VERY IMPORTANT FOR YOUR LIFE

Right?

Also… I missed you. Sorry I haven’t talked to you in a while… I know I don’t say it enough, and with Valentine’s Day coming up and everything… I just want you to know…

YOU’RE AWESOME

post-holiday blues

Lots of people stop baking after the holidays. Or they start making low-carb/sugar-free/delicious-free treats. Something about losing weight.

Well… That’s dumb. No offense. But my method to cure the post-holiday stupor is to make more sweets. To pad us up for the rest of the winter. Which is always inevitably long. And cold.

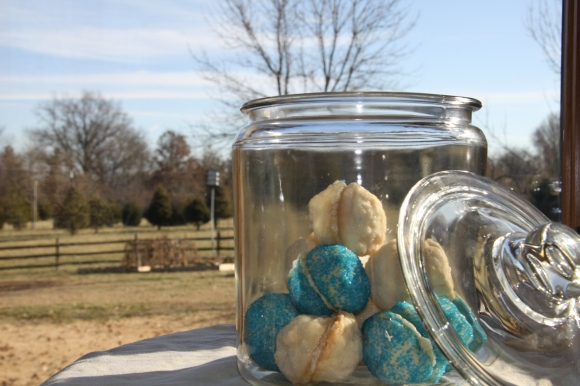
So I made some lemon glitter balls. I made them in 4th of July colors. Who said we can’t have Independence Day in Christmas?

But… in case you’re not up to me changing around the holidays I shot them in regular holiday color combinations.

They’re really good – light and fluffy. However the lemon cream stuff in the middle doesn’t really want to set. The halves are kind of slippery. The lemon juices are kind of getting my new jar dirty. Do you like my jar? I won it at Christmas! Actually, I stole it from my boyfriend’s aunt. Making a good impression on the fam, I know. It was part of the game though… And everyone else was doing it!

Anyway, I got a jar. With some cookies in it. But they were peanut butter.

Fun Fact!

Peanut butter makes me gag. I cannot describe to you the detest I feel for peanut butter. And peanuts.

Please don’t hate me. I was born this way. I can’t help it.

I’ll make you something chocolate to make up for it!

Also, if you want to make these lemon glitter balls, I would make some royal  icing, flavor it with a bit of lemon, and use that to glue together the lemon ball halves… This stuff from the recipe isn’t so hot. But the sandwich halves are good.

Glittering Lemon Sandwich Cookies, from Gourmet

1 1/3 cups all-purpose flour

2/3 cup cornstarch

1/4 teaspoon salt

2 sticks unsalted butter, softened

1/2 cup confectioner’s (powdered) sugar

1 tablespoon grated lemon zest

1 teaspoon vanilla

White and colored sanding sugar

Preheat oven to 350. Line 2 large baking sheets with parchment paper.

Whisk together flour, cornstarch, and salt.

Beat together butter and confectioner’s sugar with an electric mixer until pale and fluffy, then beat in zest and vanilla. At low speed, mix in flour mixture just until a soft dough forms. Don’t over mix!

Put sanding sugars in different bowls. Roll a scant teaspoon of dough into a ball and drop into sugar, coating thoroughly. Reshape if necessary and place 3/4 inch apart on baking sheet.

Bake until tops are slightly cracked but still pale, about 12-15 minutes. Transfer cookies to a rack to cool completely.

Either use the recommended filling (as follows) or royal icing to smush together the halves.

1 cup confectioner’s sugar

1 tablespoon grated lemon zest

1 tablespoon fresh lemon juice

2 tablespoons light corn syrup

1/2 stick unsalted butter, softened

Beat together all the filling ingredients. Transfer to a sealable bag and snip off the corner. Squirt onto a half and smush the other half on!